Veggie Bowl with Tahini & Lemon Dressing

Veggie  Bowl with Tahini Dressing

roasted veggies with a zing of tahini dressing

Dang! I totally forgot about that bundle of kale I bought last week. I discovered it languishing in the back of the fridge this morning. I managed to salvage 5 leaves from it, though, to add to the veggie bowl I had in mind when I originally bought it.

A couple of weeks ago, I lunched with a pal of mine at VeggieGrill, a healthy-style fast food place. I ordered and devoured a Harvest Bowl, which included vegetarian sausage, roasted cauliflower, steamed kale, and some kind of creamy sauce. Rather yummy, I wanted to somewhat replicate it. Not sure how close I came to imitating it, but I’m very satisfied with this version.

Best of all, this dish is highly versatile. You can use rice of your choice or quinoa or any other grain or seed. Hot or cold. As for the veggies, add your favorites. Roast ‘em, like I did, or steam them or add them fresh. See what I mean about versatility? Also, you can serve it as a meal on its own or as a side dish.

I roasted my kale along with the other veggies simply because my hunger pains were making me rush (that’s just a fancy way of saying I was lazy). However, the roasted kale added a slightly charred taste, which I enjoyed. I also wanted to add grated carrots, but in my rush of hunger I forgot. And, thankfully, I had cooked the rice the night before so I would have some on hand for the week. I often do that with rice or quinoa. Anyhow, that quickened the process as well as lessened the work load.

And the dressing? The best part! Lots of tang from both the tahini and the lemon, and then lots of pungency from the garlic. It’s a zinger of a dressing that makes the nutty rice and earthy veggies totally pop with flavor.

All in all, a bowl loaded with healthy goodies = happy belly.

Veggie Bowl with TahiniDressing2

a bowl of healthy goodies: veggies & tahini dressing

Veggie Bowl with Tahini & Lemon Dressing

Printer-Friendly Version

Note: use your favorite veggies and favorite seasonings as well as your choice of grains for this dish; the ingredients below are just a starting point

INGREDIENTS

Rice/Veggies

  • 3 cups cooked rice (brown or white) or quinoa (I used short grain brown rice which cooks up plump and chewy and nutty…I sometimes buy Lundberg brand or buy from bulk bins at Whole Foods)
  • 1 small crown of broccoli
  • 1 small yellow squash
  • 5 leaves curly kale
  • olive oil
  • seasoning (I used Penzey’s Shallot Pepper, which is fantastic of all veggies, corn on the cob, and baked potatoes)

Tahini Dressing

  • 1/4 cup freshly squeezed lemon juice
  • 2 tbsp. tahini (which is sesame paste…I bought mine at Trader Joe’s)
  • 3 cloves garlic, minced
  • 1/2 tbsp. lemon zest (I actually left this out)
  • 1 tsp. kosher salt
  • 1/2 tsp. pepper

DIRECTIONS

  1. Cook rice or quinoa, following directions on package. For the short grain brown rice I purchased from the bulk bins at Whole Foods, I rinsed the rice thoroughly using a strainer, then added it to a pan with 2 cups chicken broth (water or vegetable broth works, too). I brought it to a boil, reduced it to a simmer, and cooked covered for 25 minutes. Keep it covered for 10 more minutes after cooking, then fluff with a fork. This makes about 3 cups cooked grains. It keeps well in the refrigerator for several days. Just microwave when ready to use after refrigerating if you want hot rice.
  2. Preheat oven to 350 degrees F.
  3. Chop broccoli and squash into bite-sized pieces; place in roasting dish. Separate kale leaves from stem, then tear into small pieces; add to dish. FYI: If you don’t want your kale charred, I suggest adding it after 10 minutes of baking. Or massage it instead to tenderize it (yep, it really works!). Or steam it.
  4. Generously drizzle olive oil over vegetables, then give a hearty sprinkling of your favorite seasoning (or I bet skipping the seasoning would be fine because the dressing gives a powerful punch of flavor). Toss to mix. Roast veggies for 15-20 minutes, until done to your desired tenderness.
  5. For Tahini Dressing: While veggies are roasting, place lemon juice, tahini, minced garlic, zest, salt, and pepper in a small food processor and pulse until mixed. Alternatively, you can just whisk with a fork until it’s all mixed. Or even easier, shake it in a container. If the dressing needs thinning, use a bit of water.
  6. When veggies finish roasting, toss with dressing, then add to rice and mix.

SOURCES: inspired by the Harvest Bowl at VeggieGrill; dressing from A Full Measure of Happiness

Beef Wellington (Classic Style)

Hubby and I spend each New Year’s Eve quietly at home, enjoying an elegant homemade dinner. This year, I opted to try Beef Wellington, a recipe I had clipped from the Jan. 2011 Fine Cooking magazine.

Beef Wellington

Beef tenderloin wrapped in chicken pâté/duxelles, crepes, and puff pastry

It just looked so yummy in the magazine: juicy red beef enveloped in flaky puff pastry crust. I knew one day I would try it.

Beef Wellington

Isn’t the baked Beef Wellington gorgeous all wrapped up in puff pastry?

Well, it’s more than just beef wrapped in puff pastry. It’s actually quite an involved recipe that takes several steps of prep (some which can be done in advance) and requires a lot of expense. See why I saved it for New Year’s Eve dinner? It’s definitely a splurge, both in cost and time.

Let me briefly explain Beef Wellington: a tender slab of center-cut beef tenderloin enveloped in a mixture of liver pâté and cooked, minced mushrooms spread onto crepes that are wrapped around the beef, which is then all wrapped into a puff pastry dough.

The pâté/mushroom mixture releases some fat into the meat as well as some savory flavor. The crepes help absorb the meat juice and keep the puff pastry crisp. It’s baked until the meat is rare,  then it is sliced and served with a savory and sweet Madeira sauce.

So, it involves buying an expensive piece of center-cut beef tenderloin, which I purchased at a local butcher shop.

I made my own beef broth, but you can easily purchase broth instead. The broth is used to make the Madeira sauce, which is poured over the cooked slices of Wellington (or you can serve the sauce in small dishes and use it for dipping, I suppose). The homemade broth can be made ahead of time and refrigerated for up to a week or frozen for up to a couple months.

Next, I bought pricey Portobello mushrooms to make duxelles (duck-SO), which is a mixture of finely minced mushrooms, shallots, and herbs sautéed in butter and used as a stuffing or in sauces (see link for more uses). This step can be made ahead of time as well, refrigerated for a few days or frozen up to a couple months in advance.

Duxelles

Duxelles–not the most photogenic food, but the minced and cooked Portobello sure add savory depth to dishes

Then, I made chicken liver pâté. Chicken livers are inexpensive, the pâté is easy to make, and it actually tastes very savory spread on crackers or baguette slices. This, too, can be made a few days in advance and refrigerated (not sure if it can be frozen). It later gets mixed with the duxelles to form the pasty mixture that is spread onto the crepes and wrapped around the beef tenderloin.

Chicken Liver Pate

Chicken Liver Pate–tastes a lot more appetizing than it looks!

I made my own crepes, which can be a bit tricky. I’m not sure if crepes can be purchased frozen, but that would save some time. The crepes can be made a day in advance and stored in the fridge.

Crepes

Crepes all ready for the duxelles/pâté spread

Beef Wellington

Dotting the pâté/duxelles mixture to make spreading it over the crepes easier

Beef Wellington

Place browned and cooled tenderloin onto crepes spread with pâté/duxelles, and wrap crepes snugly around tenderloin

Beef Wellington

See those extra crepes on the end? Cut them off; otherwise, you’ll get bug chunks of baked dough on the ends like I did!

You can make your own puff pastry, but I opted to purchase it instead–much easier and quicker.

Beef Wellington

Beef Wellington getting wrapped in puff pastry

Beef Wellington

Beef Wellington snuggly wrapped in puff pastry and ready for baking

You’ll need a bottle of Madeira wine to make the sauce.

Beef Wellington

See the Madeira sauce in the background?

It takes a lot to make this, but it’s well worth it, especially if you want to impress some guests.

Let’s recap quickly: beef tenderloin, duxelles, liver pâté, crepes, puff pastry, and Madeira…and time.

Throughout the process, I thought, “This is the only time I’m going to go through the effort to make all this.” However, now that we’ve tasted it and savored it for leftovers for two nights, I would certainly make it again, and the steps don’t seem as daunting now that I’ve made it.

What made the whole experience even more fun, though, is that I pulled out my fine china (rarely used), set up a lovely table, and had everything ready to serve the minute hubby walked in the door from work. I even got semi dressed up to celebrate the new year (and the excitement of hubby having started a new job right before Christmas, a career change that required two years of schooling and lots of interviewing these past few months). All in all, the entire meal was a smashing success!

Beef Wellington

Beef Wellington–layers of savory goodness

By the way, I served the Beef Wellington with Roasted Brussels Sprouts and Mashed Cauliflower.

RECIPE:

Rather than  type up the entire lengthy recipe, I found a link to it on Fine Cooking’s website along with a video. Truly, it’s not as daunting as it all appears, and it’s well worth the effort if you are game for trying something new and on the gourmet side of cooking.

Chicken Pot Pies

I roasted a chicken the other night, which always leaves us with leftovers, so I decided to make chicken pot pies and realized I hadn’t shared a recipe for those yet. I make them about once a year because the recipe makes six pies, which carries us through the chilly season with only two of us to feed.

Chicken Pot Pies

Chicken Pot Pies

The chicken pot pies at some of the chain restaurants used to be my staple order until I began making my own. Nothing beats the flavor of homemade chicken pot pies, though, so no more mass-produced chain restaurant pies for me.

Chicken Pot Pies

Chicken Pot Pies

These homemade pies do take a bit of work but not excessively so. You can certainly cut corners by purchasing a rotisserie chicken and precut and/or frozen veggies. However, don’t skimp corners on the crust. This crust contains tangy cream cheese and is spiced up with some pepper. Fantastic flavor. So easy to work with, too: not too sticky and you can handle it without having to first refrigerate it.

Chicken Pot Pies

Chicken Pot Pies with a cream cheese crust

The first time I made these, I pressed the dough on the rims of the bowls to make sure it would stick. Bad idea. I guess I pressed so hard that during baking the sides just slipped off! Looked like the pot pies decided to drop their skirts ;  ) I’ve since learned, thanks to Ina Garten’s Barefoot Contessa cooking show, to brush both sides of the dough with an egg wash. The inside brushing helps the dough adhere to the bowl while the outside wash gives a sheen to the cooked crust. Thank you, Ina, for that handy dandy tip.

Chicken Pot Pies

Chicken Pot Pies loaded with chicken and veggies

Once cooked, these freeze beautifully. Just double wrap snugly in plastic wrap followed by an aluminum foil wrap, and you can then bake them straight from the freezer. Love the ease of that.

Now, if making entire chicken pot pies doesn’t appeal to you, the folks at Cooks Illustrated have created a casserole version that tastes equally yummy and is easier than making pot pies.

Chicken Pot Pies

Printer-Friendly Version

INGREDIENTS

FIlling

  • 3 tbsp. unsalted butter
  • 1 medium onion, chopped
  • 1 large russet potato, peeled and diced into small chunks
  • 3 cloves garlic, minced
  • 1 red bell pepper, diced small
  • 1 cup celery, diced small (not part of original recipe)
  • 1 cup carrots, diced small (or use frozen carrots)
  • 8 ounces button mushrooms, sliced
  • 1 cup frozen peas
  • 4 cups cooked, shredded chicken
  • 1/2 tsp. crushed red pepper flakes
  • salt and pepper

Sauce

  • 8 tbsp. (1 stick) unsalted butter
  • 1 cup all-purpose flour
  • 2 1/2 cups chicken broth
  • 1/2 cup heavy cream (optional)
  • dash hot sauce
  • salt and pepper

Crust

  • 3 cups all-purpose flour
  • 1 tsp. salt
  • 1/4 tsp. pepper
  • 16 tbsp. (2 sticks) cold, unsalted butter
  • 10 ounces cream cheese, chilled
  • 1 large egg

DIRECTIONS

  1. To make filling: Melt butter in a large skillet over medium heat. Add onion and potato to pan; saute for 5 minutes.
  2. Add garlic, bell pepper, celery, carrots (if using raw) and mushrooms; cook for about 15 minutes, until potatoes are tender.
  3. When veggies finish cooking, add cooked and shredded chicken along with frozen peas (and carrots if using frozen carrots). Stir in red pepper flakes as well as season with salt and pepper to taste.
  4. To make sauce: Melt butter in a large saucepan over medium heat. Add flour and whisk until smooth (mine lumped up into a big ball).
  5. Add broth about 1/4 cup at a time, whisking it into the flour mixture. Continue cooking over medium heat until it thickens into a creamy sauce. If using heavy cream, mix that in now. Add hot sauce as well as salt and pepper to taste.
  6. Pour cream sauce over chicken and veggies; stir to combine.
  7. Spoon the filling into 6-8 individual oven-safe ramekins (mine are 4 1/2 inches in diameter).
  8. Preheat oven to 375 degrees F at this point.
  9. To make crust: Place flour in bowl of food processor along with salt and pepper. Pulse briefly to mix.
  10. Cut cold butter into 16 pieces and add to food processor; pulse until flour and butter are crumbly.
  11. Add cream cheese; continue to pulse until dough forms a ball. Transfer dough to a lightly-floured work surface. Use a floured rolling pin to roll dough into a rough rectangle about 1/4-inch thick. Cut dough in half lengthwise, then into thirds in the other direction, making six squares (or if you have 8 pies, cut accordingly). If squares are too small to fit over bowls, you can roll each one separately to enlarge them to needed size.
  12. Beat egg with a whisk, then brush dough with the egg. Place brushed side down over bowls, and gently press sides until they adhere to bowl. Now brush egg over top side of dough.
  13. Place pies on a foil-covered baking sheet (both for ease of transfer as well as any overflow of filling). Cut several slits into pie tops. Place pies into oven and bake for 20-25 minutes, or until golden brown (if your crusts are on the thick side, you may need to bake a bit longer).
  14. Baked and cooled pies can be frozen. Wrap snugly in plastic wrap followed by an aluminum foil wrap. Either thaw frozen pies in refrigerator on the day you intend to eat them, then reheat in 350 degree F oven for 30-40 minutes. Alternatively, pies can be reheated straight from freezer at 400 degrees F for 45-60 minutes.

SOURCE: adapted from Annie’s Eats via Ezra Pound Cake via the cookbook The Pastry Queen

Chiles Rellenos with Salsa Ranchera (made with Hatch Chiles)


Chiles Rellenos

Chiles Rellenos made from Hatch Chiles


August and September are Hatch Chile months.

And what are hatch chiles? Well, they look a lot like Anaheim chiles, which are light green in color and rather large. However, Robert Schueller of Melissa’s produce described hatch chiles as the “grandfather” whilst the Anaheim is like the “grandchild.”  Additionally, hatch chiles have a much thicker skin, making them great for roasting and even freezing. I had never thought to freeze roasted chiles or peppers!

These particular mild-medium heat chiles hail from New Mexico, but you can find them in local markets during the months of August and September. As a matter of fact, I just saw them advertised in the Sprouts weekly ads, so I’m off the pick some up this weekend and have my own Hatch Chile Roasting event with our backyard barbecue grill!

Hatch Chiles

Roasted Hatch Chiles

If you want to attend a live hatch chile roasting event, Melissa’s Produce offers a schedule of dates and locations.

Anyhow, after my Camp Blogaway experience and the contacts I made, I found myself invited to attend a Hatch Chile Lunch at Melissa’s Produce, at which the hosts provided us yummy foods made from hatch chiles with recipes from the new Hatch Chile cookbook presented by Melissa’s Produce.

In addition, we walked away from the event with the cookbook and both dried and frozen hatch chiles to test out a few recipes.

The most unique item on the lunch menu included hatch chile ice cubes! How clever!! What a way to literally spice up your party drinks. Just use a food processor to chop up two hatch chiles, mix with six cups of water, let sit for about 5 minutes, then freeze in your ice cube trays. Voila–spicy ice cubes. The people at Melissa’s served them with ginger ale and lemonade. As they begin to melt, your drink takes on a slight kick of heat that actually complements both drinks (I taste-tested both).

The lunch event opened my eyes to the possibilities of using chiles to add an element of sassiness to a variety of foods, ranging from ice cubes to sweet treats such as cookies to breakfast/lunch/dinner fare and even to nut & pretzel snack mixes. Who knew a chile could provide such versatility? (I took tons of pictures but cannot find the memory card with the images–ARGH!!)

With a cookbook full of recipes to try and some frozen hatch chiles in my freezer, I perused the variety of options and decided on Chiles Rellenos, which hubby requested I make many months ago. They ended up being a lot less work than I had anticipated, in part due to the pre-roasted and frozen chiles (such a bonus!). By the way, you can attend Hatch fire-roasting chile events in the months of August and September (check out this schedule of locations and dates).

I also used some of the chiles to make a Salsa Ranchero recipe from the cookbook to accompany the Chiles Rellenos. You can easily use your food processor to pulse the salsa a bit more if you want a less chunky consistency. All in all, we both enjoyed the Chile Rellenos: mild chiles, cheesy interior, crunchy coating, and slightly spicy salsa to top it all off.

Chiles Rellenos with Salsa Ranchera

Printer-Friendly Version

INGREDIENTS

Chiles Rellenos

  • 12 large Hatch Chiles, roasted, peeled, and left whole
  • 1 pound cheddar, Jack, or queso blanco cheese, shredded
  • 4 large eggs, well chilled and separated
  • 4 tbsp. all-purpose flour
  • 3/4 tsp. baking soda
  • 1/4 tsp. salt
  • 1 cup vegetable oil

Salsa Ranchera

  • 1 tbsp. olive oil
  • 1 large onion, chopped
  • 2 cloves garlic, minced
  • 8 Hatch Chiles, roasted, peeled, stemmed, seeded, and sliced into thin strips
  • 1 (28-ounce) can diced tomatoes, with juice
  • 1/4 tsp. ground cumin
  • 1/4 tsp. salt
  • 1 tbsp. cornstarch
  • 1 cup chicken broth

DIRECTIONS

Chiles Rellenos

  1. Methods to roast chiles: To roast over an open flame, use long-handled tongs to hold the chile over a medium flame, turning until evenly charred (I’ve done this over the flame on the stove before). To roast on a barbecue grill, heat the grill until hot. Roast chiles over the direct heat until they are blackened and blistered all over. To roast under a broiler, preheat broiler to high. Arrange chiles in a single layer on a foil-lined baking sheet and set under broiler. Roast until blackened and blistered all over, turning so all sides get roasted.
  2. Once chiles are roasted, cool using one of the following methods: Transfer roasted chiles to a paper bag, roll the top down, and allow to cool. Or, transfer roasted chiles to a pan or bowl and cover with a tight-fitting lid, a damp towel, or with plastic wrap.
  3. Once chiles are cool enough to handle, the skins will easily peel off. For chiles rellenos, leave the stem intact, cut a lengthwise slit up one side of each chile (careful, though, to not cut through the tip end), and delicately remove the seeds so you don’t tear the chile.
  4. Fill the slit chiles with cheese and use toothpicks to hold the chiles closed.
  5. In a large bowl, beat the egg whites with an electric mixer until soft peaks form.
  6. Add the flour, baking soda, salt, and egg yolks; mix until completely incorporated.
  7. Heat the oil to 350 degrees F in a large, deep skillet over medium heat (I used a 10-inch cast iron skillet). Working in batches, dip the stuffed peppers into the batter and fry, turning once, until golden brown, about 3 minutes per side. Drain on paper towels.
  8. Serve with Salsa Ranchera.

Salsa Ranchera

  1. Heat the olive oil in a large saute pan over medium-high heat. Add onions, cooking until translucent and softened.
  2. Add garlic; saute one minute (don’t allow garlic to brown or it will taste bitter).
  3. Add chiles; saute for 3 more minutes.
  4. Stir in tomatoes and their juice, then add cumin and salt. Bring to a boil, then lower heat and simmer for 15 minutes.
  5. Dissolve cornstarch in the chicken broth. Add broth to pan and bring salsa to a boil. Lower heat to a simmer; cook salsa for 10 minutes or until thickened to your desired level of thickness. (Since I prefer my salsa less chunky, I process mine in the food processor to my desired consistency.)

SOURCE: Melissa’s Hatch Chile Cookbook

Chicken Enchilada Verde

Today I bring you a kick-in-the-mouth Chicken Enchilada Verde dish.

Chicken Enchilada Verde

Spicy verde sauce makes these enchiladas sizzle

Despite the somewhat unsightly green appearance from the verde sauce, it actually imparts a pleasing taste, slightly tangy from the tomatillos and definitely spicy from the serrano peppers. The sour cream and the queso fresco cheese slightly offset that spicy kick, though, as well as adding a slightly salty  and light contrast.

Speaking of queso fresco, if you have a Mexican market near you, check for cheese there. I recently discovered that the cheese from behind the counter at the local Mexican market tastes a heckuvalot fresher and more flavorful than the packaged stuff I used to buy.

Let me warn you, these enchiladas pack quite a spicy kick. I’ve made them twice, and I jotted a note to take the seeds out of the serrano peppers next time I make them. However, that heat dissipates rather quickly, so don’t despair when your mouth rages with fire.

I had never cooked with tomatillos prior to this recipe. Somehow, I ended up with a bunch of them and approached the internet for ideas to use them. After reading Elise’s post about how even her young nephew gobbled them up, I decided to give it a try. Definitely heed her suggestion to use chicken thigh meat, as its tenderness adds to the deliciousness of this dish. And don’t skip coating the tortillas in oil, for it keeps them pliable for the rolling of the enchiladas.

I know it’s blazing hot and humid across the country right now, but this dish requires no oven. You boil the meat (or buy precooked chicken), boil the tomatillos, blend the sauce, and heat it in a saucepan. Okay, I take the oven part back. However, you simply keep the enchiladas warm at a very low temperature. For that matter, I guess you can microwave them at the last minute if you really don’t want to use your oven. Point is, this is a fairly easy recipe and doesn’t require you to heat up the house in the making of it. Give it a try. I surprised my picky palate with this one.

P.S. “Verde” means “green” in Spanish.

Chicken Enchilada Verde

Chicken Enchiladas Verde flavored with tomatillos and serrano peppers

Chicken Enchilada Verde

Printer-Friendly Version

INGREDIENTS

Chicken

  • 4 chicken thighs, bone-in, skins removed (about 1 3/4 pounds)
  • 1 clove garlic
  • 1/4 wedge yellow or white onion
  • 1tsp. salt

Verde Sauce

  • 1 1/2 pounds tomatillos
  • 3 serrano peppers
  • 2 cloves garlic
  • 1/3 cup white or yellow onion, roughly chopped
  • 1/4 cup roughly chopped cilantro, packed
  • 3 tbsp. sour cream

Enchiladas

  • canola oil
  • 12 corn tortillas
  • 1/2 cup crumbled Mexican cheese, such as queso fresco or cotija
  • chopped onion and cilantro for garnish

DIRECTIONS

  1. To prepare chicken: Place chicken thighs in a medium-sized saucepan; cover with water. Add one garlic clove, cut in half; 1/4 of an onion; and 1 tsp. salt. Bring to a boil, then reduce heat and allow to simmer, covered, for 20 minutes, until chicken is just cooked through. Remove thighs to a bowl and allow to cool. (If you prefer to roast the thighs, I’ve included a lime marinade/roast at the end.)
  2. When cool, remove chicken from bones and shred meat using a knife or fork. Add 1/2 cup of the verde sauce (below) to the chicken, and also add salt if needed.
  3. To make verde sauce: Remove outer husks from tomatillos. Rinse and place in saucepan, then cover with water. Remove tops from serrano peppers; add them to the pan. If you want to reduce the spiciness of the dish, consider cutting the peppers in half and removing all or some of the seeds. Bring to a boil, then reduce heat and simmer for 5 minutes, until tomatillos soften. Remove tomatillos and peppers from pan but save 1/2 cup of the cooking liquid.
  4. Into a blender, place tomatillos, serrano peppers, 1/2 cup of the cooking liquid, 2 cloves garlic, 1/3 cup onion, 1/4 cup chopped cilantro, and 1 tsp. salt; puree until completely blended, 15-30 seconds.
  5. Pour sauce into a skillet (one that is large enough to fit a corn tortilla), simmer for 5 minutes, then remove from heat.
  6. To prepare enchiladas: Soften and heat tortillas by placing a cast-iron skillet (or other frying pan) over medium-high heat and add 1 tbsp. canola oil. When hot, place a tortilla in the pan for a few seconds to absorb some oil, then flip it using tongs or a spatula. Place another tortilla directly on top of the first (it will soak up some of the oil), and flip again. Remove tortillas to a paper-towel lined plate. Add more oil to pan and repeat process with all tortillas. FYI: If using homemade tortillas, you can skip this process because they will be softened and heated already.
  7. At this point, heat the oven to 200 degrees F so you can keep the enchiladas warm while you finish the sauce.
  8. Now, take each tortilla and dip it into the sauce, piling them up again on a plate. Spread about 1/4 cup of the chicken just below the center of each tortilla, then roll it up. Place enchiladas into an oven-proof serving pan (I used my rectangular glass pan), and place filled pan into warm oven.
  9. Heat the verde sauce again to simmering, then remove from heat. Add sour cream; stir until blended. Pour verde sauce over warmed enchiladas. Top with cheese. Garnish with onion and cilantro, if desired.
  10. Serve immediately.

SOURCE: adapted from Simply Recipes

Lime-Roasted Chicken Thighs

INGREDIENTS

  • 3/4 pound chicken thighs (3 large)
  • juice of 2 large limes (1/4 cup)
  • 1/4 cup olive oil
  • 2 tsp. kosher salt, divided
  • 1/2 tsp. ground black pepper

DIRECTIONS

  1. Preheat oven to 375 degrees F.
  2. Rinse thighs under cold water and pat dry.
  3. Mix lime juice, olive oil, kosher salt, and pepper, then toss thighs in mixture; refrigerate. Allow thighs to marinate for at least one hour and up to all day.
  4. Place chicken thighs in roasting pan lined with foil, or simply oil the pan. Roast thighs 20-25 minutes, then flip and roast an additional 10 minutes. Remove from oven, cool, then shred chicken for enchilada filling.

SOURCE: adapted from Martha Stewart

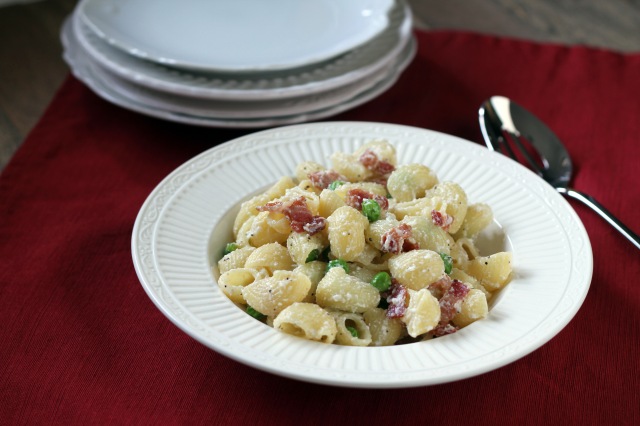
Pasta with Peas, Bacon, and Ricotta Sauce

PastaRicottaSauce

This past weekend’s visit to the local Farmer’s Market included bringing home a big bag of English peas. Have you ever eaten fresh peas? Waaaaaaaaaay better than the canned or frozen stuff. I managed to grow a few vines of peas last year, but after shelling them, I only ended up with a cup or so in total. Not much. And that was with multiple harvests. After each shelling session, I just kept storing each tiny batch in the freezer until the growing season was over. Then one day I took out my measly little bag of green goodies, boiled them in a bit of water for a couple minutes, tossed them with some butter, and I was in love. There is no going back now. I just planted more peas for this spring and hope to have more success.

In the meantime, the explosion of spring goodies at the Farmer’s Market happened this past weekend, including piles and piles of English peas–big fat ones. I stocked up on a gigantic bag of peas, not minding that I would have to shell them all. Now, what in the world was I going to make with all these chubby little green pearls? It is times like this when life throws a recipe at me just as I need it. Skimming through Marcella Hazan’s Essentials of Classic Italian Cooking, a recipe using ricotta, which I had on hand, and peas fell open. Perfect!

So I whipped this up. Very easy. Makes a fantastic quick meal, perfect for a weeknight after a long day at work. The dish tastes light and flavorful. It contains chewy pasta, pungency from the parmesan-reggiano cheese, softness and sweetness from the peas, and a smoothness from the little bit of butter and the ricotta. Oh, and my favorite part: a salty chew from the bacon. Quite the mix of flavors, isn’t it? Yet all so easy to throw together.

I used conchiglie pasta, which I’ve usually seen as shell shaped. This particular bag I bought, though, was more like curved hollow tubes, and after mixing everything together, I found the peas hiding out in the tubes :  ) I can imagine that little kids would find that amusing. Okay, so I found it amusing, and it just made eating this potpourri of flavors even more fun.

Pasta with Peas, Bacon, and Ricotta Sauce

Printer-Friendly Version

INGREDIENTS

  • 1 lb. fresh, young peas, unshelled weight OR 1/2 of a 10-ounce package of tiny frozen peas, thawed (I measured 5 ounces of freshly shelled peas, which equalled about 1 cup of peas)
  • 1/4 lb. lean slab bacon (I used 3 1/2 slices to equal 4 ounces)
  • salt
  • 1/4 pound fresh ricotta
  • 1 tbsp. butter
  • 1/3 cup freshly grated parmigiano-reggiano cheese, plus additional for garnishing
  • black pepper
  • 1 pound pasta (conchiglie, fusilli, or rigatoni)

DIRECTIONS

  1. Prepare pasta. Begin by boiling 4 quarts of water. When it reaches a boil, add 1 1/2 tbsp. salt (this helps flavor the pasta). When it reaches a full, rolling boil again, add the pasta and cook according to package directions.
  2. In the meantime, add the ricotta to a large bowl, breaking it up with a fork. Add the butter (I cut the butter into small pieces). Set aside.
  3. Place peas in a small saucepan; pour in enough water to just cover them. Bring to a gentle boil for a couple of minutes, then drain and set aside.
  4. Cut the bacon into small bite-sized pieces. Using a small saucepan, cook over medium heat until browned but not crisp. Pour off all but two tablespoons of the fat. Add the peas, stirring to coat. Cook at medium heat for 2 minutes, but time this to finish just before you drain the pasta.
  5. Drain pasta and immediately put into the bowl with the ricotta, tossing until well mixed (my pasta & sauce looked a bit dry and I was wishing I had saved some of the pasta water to help smooth out the ricotta sauce). Add the peas and bacon, again tossing until well mixed.
  6. Add the grated cheese, salt and pepper to taste, and toss again until well mixed. Serve immediately.

SOURCE: Marcella Hazan’s Essentials of Classic Italian Cooking

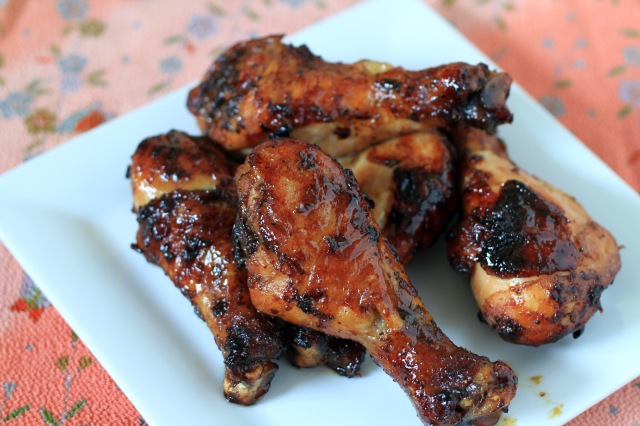
Orange-Glazed Chicken

OrangeGlazedChicken

Despite all the chicken recipes I have posted, hubby and I actually eat a lot more red meat and fish than the blog showcases. You see, my hubby is a fisherman and hunter at heart, a person born in the wrong era. He should have been a pioneer frontiersman.

He also usually cooks the meat and fish, liberally sprinkling on a variety of spices–whatever he is in the mood for. I, on the other hand, am a recipe follower. And I’m the one who experiments with the chicken recipes. Although we have freezers full of the game and ocean fish he brings home, we buy chicken just for the sake of having variety in our meals.

We had some drumsticks hanging around the freezer a few weeks back, and this Orange-Glazed Chicken recipe crossed my path around the same time I decided they needed to be cooked. Wow! This marinade packs a flavorful punch. It’s sweet from the orange juice and brown sugar; savory from the garlic and green onion; packs on more subtle spicy flavor with the ginger, anise, and cinnamon; and the addition of soy sauce and rice vinegar creates an Asian flair. Oh, and the final glaze of honey provides one more layer of sweetness.

I can’t get enough of these sweet things. They are so darn delicious that you just keep going back for more! I knew I would be making them again soon–both because I craved them and because I wanted to take photos for the blog (didn’t get around to that the first time).

Although I made these using only drumsticks, the marinade would work with all chicken cuts as well as with an entire roast chicken.

OrangeGlazedChicken2

Orange-Glazed Chicken

Printer-Friendly Version

INGREDIENTS

  • 10-12 chicken drumsticks (or one chicken, whole or cut up)
  • freshly ground black pepper
  • 2 tbsp. honey
  • orange slices for garnish

Marinade Sauce

  • 3 cloves garlic, minced
  • 2 tbsp. freshly grated ginger (TIP: I keep 1-inch pieces of peeled ginger in a resealable bag in the freezer for recipes calling for grated ginger)
  • 1 tsp. ground anise
  • 1 1/2 tsp. ground cinnamon
  • zest of one medium-sized orange
  • 1 cup freshly squeezed orange juice (about 3 medium oranges)
  • 3 tbsp. low-sodium soy sauce
  • 1 tbsp. rice vinegar
  • 1/2 tbsp. brown sugar
  • 4 green onions, coarsely chopped
  • 1 tbsp. sesame oil

DIRECTIONS

  1. In a small saucepan, bring to a simmer all marinade ingredients except the sesame oil. Simmer for 15-20 minutes, allowing marinade to thicken, then remove from heat.
  2. Stir in sesame oil and allow marinade to cool completely.
  3. Set aside (refrigerate) 1/4 – 1/2 cup marinade for basting during roasting, then pour remaining marinade into a resealable plastic bag. Add chicken pieces and coat well. Seal bag, place in refrigerator, and allow meat to marinate anywhere from 2-24 hours.
  4. Preheat oven to 425 degrees F. Line a baking pan with foil (otherwise you will have quite the mess to scrape up during cleaning time), and evenly spread chicken pieces onto pan. Sprinkle with ground black pepper, the place pan into preheated oven.
  5. Roast chicken for 45-50 minutes, turning and basting 2-3 times with the marinade you set aside. During the final basting, brush with honey (TIP: if  honey is too thick to brush onto chicken, microwave it for 15-30 seconds).

SOURCE: Season with Spice

Peruvian Roast Chicken

PeruvianChicken1

The travel bug infected me eons ago in my early adulthood when a family friend from Australia stayed with us. She regaled us with stories of her escapades, and that’s when the symptoms began to eat away at me.

As a teacher, fortune smiles upon me every summer with time and freedom to explore. In my single years I would take off, either road trips exploring the Western region of the United States or exotic destinations like Egypt, Greece, Turkey… I even spent two years teaching in Japan, allowing me side trips to explore the Asian destinations of China, Korea, and Thailand. With hubby, we’ve spent time exploring the grand ol’ states with a few exotic destinations tossed in over the years.

This particular trip that I mentioned in the previous post, the trip that has us sooooooo excited that we awoke at 3 a.m. and couldn’t sleep anymore and got up and made breakfast at the ungodly hour of 4 a.m. — this trip is a bucket list trip item. As of tonight, we’ll be on the red eye flight to South America, with Peru as the first stop. Hubby’s bucket list item includes a visit to the ancient ruins of Machu Picchu. For me, the next leg of our trip includes Iguazu Falls in Argentina, incredible massive falls that far surpass Niagra (which I’ve never seen, by the way). I’ve wanted to visit Iguazu for almost a decade now, and it has taken three years of diligent monthly savings to arrive at this day. I feel about to burst with the anticipation.

So, in honor of our trip, I made Peruvian Roast Chicken. I had to. It called to me.

I mixed the marinade paste with a bit of trepidation. It uses habanero chile, tops in heat. And the little orange chiles are miniscule in size for packing quite a punch! I also wasn’t keen on using mint leaves in the recipe simply because I’m not a huge fan of mint (except in Peppermint Patties).  I forged ahead, though. The paste is very thick and reddish. The chicken got a good rub-a-dub-dub both under and atop the skin, then it sat in the fridge for a few hours. The final roasted bird did not taste as hot as I had worried it might. The combo of flavors was definitely on the spicier side but not overly so. Hubby really liked it. I liked it but, truthfully, prefer the Herb-Roasted Chicken I make.

Now, I must finish packing and cleaning the house. So much to do before departing for a big trip.

Peruvian Roast Chicken with Garlic and Lime

Printer-Friendly Version

INGREDIENTS

  • 3 tbsp. extra-virgin olive oil
  • 1/4 cup lightly packed fresh mint leaves
  • 2 tbsp. kosher salt
  • 6 medium garlic cloves, peeled and roughly chopped
  • 1 tbsp. ground black pepper
  • 1 tbsp. ground cumin
  • 1 tbsp. granulated sugar
  • 2 tsp. smoked paprika
  • 2 tsp. dried oregano
  • 2 tsp. finely grated zest and 1/4 cup juice from 2 limes
  • 1 tsp. minced habanero chile
  • 1 (3/12 to 4 pound chicken)
  • not really an ingredient, but you will either need a vertical roaster or make your own using a 12-ounce can of beer

DIRECTIONS

  1. Place all ingredients except chicken into a blender; mix until a smooth paste forms, 10-20 seconds. (FYI: use gloves when handling habanero chile or your hands will BURN!)
  2. Gently loosen the skin of the chicken over the breast and thighs; remove any excess fat. Rub half the paste beneath the skin; spread remaining paste over entire outside of chicken. Place chicken in a large resealable bag, then refrigerate for 6-24 hours.
  3. Adjust oven rack to lowest position and heat oven to 325 degrees F. Place vertical roaster (or half empty can of 12-ounce beer) onto a rimmed baking sheet (cover it in foil first to catch drips). Slide the chicken onto your roaster so it stand upright with breast perpendicular to pan. Roast until skin just begins to turn golden and instant read thermometer inserted into thickest part of breast registers 140 degrees, 45-55 minutes. Remove chicken (and pan) from oven, followed by increasing temperature to 500 degrees.
  4. When oven is ready, place one cup of water in the bottom of the pan; return to oven. Roast until entire skin is browned and crisp and instant read thermometer registers 160 degrees inserted in thickest part of breast and 175 degrees in thickest part of thigh, about 20 minutes. If water evaporates, add more to keep pan from smoking. Rotate chicken halfway through cooking.
  5. When cooked through, remove chicken from oven and allow to rest, still vertical, for 20 minutes before carving.

SOURCE: America’s Test Kitchen

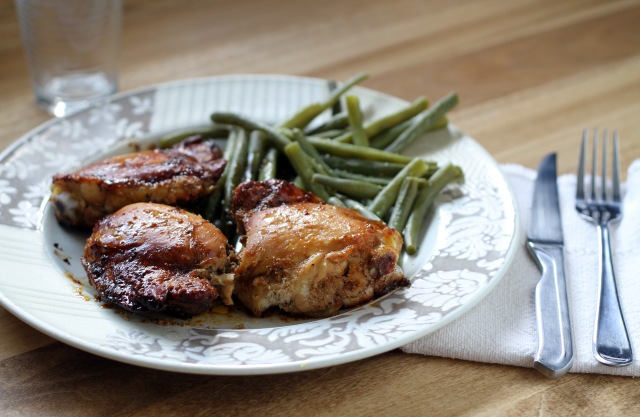
Chicken Thighs with Garlic and Worcestershire

ChickenThighsWant to cook some super tasty chicken thighs that only use two ingredients? Want some chicken thighs that cook up super tender and moist? Then read on, for I’m about to share with you my hubby’s simple yet scrumptious recipe.

These chicken thighs are one of his specialities. He liberally sprinkles them with garlic powder and Worcestershire sauce then cooks them low and slow. They come out super tender and flavorful–amazingly flavorful for only two ingredients, actually. Make lots because they shrink, first of all, and secondly, they taste fantastic as leftovers. You’ll be craving more, so go ahead and make extra.

The recipe below is a bit on the vague side in terms of ingredient amounts and cooking time. There are no hard and fast rules to this one; just go with what feels right to you in terms of flavorings and pay attention to the doneness of the meat for the actual cooking time.

Chicken Thighs with Garlic and Worcestershire 

Printer-Friendly Version

INGREDIENTS

  • bone-in chicken thighs with or without skin–as many as you desire to cook
  • Worcestershire sauce
  • garlic powder

DIRECTIONS

  1. Rinse chicken under cold water and pat dry.
  2. Place chicken thighs in a large pan, packing them in there. Liberally sprinkle with Worcestershire sauce followed by a liberal sprinkling of garlic powder (of course, you can use less-than-a-liberal amount but we love these two flavors).
  3. Turn heat to medium-low and cook chicken until bottom of meat begins to lose its pinkness, then turn over and cook other side. Add more flavorings, if desired, after turning thighs over. This takes about 30-45 minutes overall, depending on size of thighs. Sometimes we place a cover over the pan after turning the meat to keep moisture and flavors from escaping too much.

SOURCE: hubby’s recipe

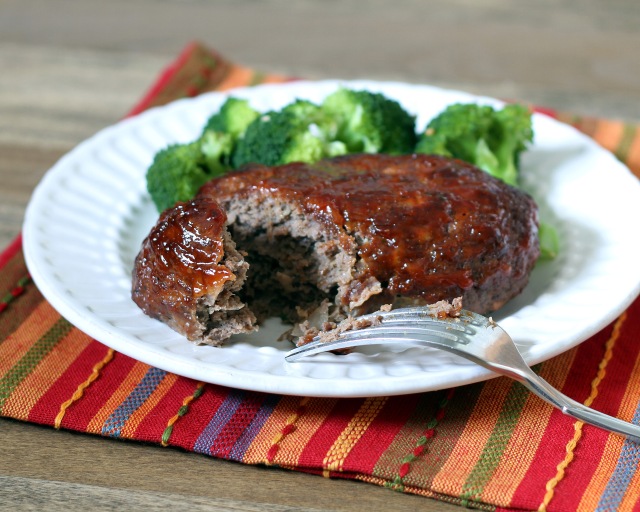
Mini Meatloaves

IndividualMeatloaves2Meatloaf. My mom only made it a couple times in my youth as far as I recall. Other friends have memories of dry, bland meatloaf akin to cardboard. Or slathered in just ketchup.

Well, this version is far from bland or dry. Nor is it smothered in plain ol’ ketchup.

This version sports pizazz. It screams savory. You’ll come back begging for more. You’ll dream about it all night long. You’ll wake up in the middle of the night to sneak a taste. You’ll wonder if the morning will ever cross over into noon to eat the leftovers your brought to work for lunch.

Okay, you get the picture. It’s tasty as all heck.

And to boot, they look darn cute in their individual meatloaf shapes. Besides, this way each piece gets more of the sauce to coat it. And the sauce on this recipe is my favorite part. It’s the part I dream about and that activates my salivary glands. Scrumdillyicious.

If you have nightmares about meatloaf from your childhood, it’s time to face them. And conquer them. This recipe is the solution. It’s your knight in shining armor.

IndividualMeatloaves

Remember to coat your rack in foil…such a pain to clean up otherwise! I know!!

Mini Meatloaves

Printer-Friendly Version

INGREDIENTS

Meatloaves

  • 1 tbsp. olive oil
  • 3 cups chopped onion, yellow or white (I only used 1 medium onion and reduced the amount because I’m not overly fond of onions)
  • 2 cloves garlic, minced
  • 1 tsp. fresh thyme, chopped
  • 1 1/2 tsp. kosher salt
  • 1 tsp. black pepper
  • 3 tbsp. Worcestershire sauce
  • 1/3 cup chicken broth
  • 1 tbsp. tomato paste
  • 2 1/2 pounds ground beef (I used venison)
  • 1/2 cup dry breadcrumbs
  • 2 large eggs, lightly beaten

Glaze

  • 1/2 cup ketchup
  • 1 tsp. hot sauce
  • 3 tbsp. brown sugar
  • 1/4 cup apple cider vinegar
  • 1/2 tsp. ground coriander

DIRECTIONS

  1. Preheat oven to 350 degrees F. Wrap a wire rack with aluminum foil (trust me, much easier clean up this way); using a skewer or fork, poke it with holes. Set this atop a baking sheet. (The raised rack with poked holes will allow some fat to drain off.)
  2. Heat oil in a skillet over medium heat. Add the onion, garlic, thyme, salt, and pepper; cook until onion softens and grows translucent but not browned, about 8 minutes.
  3. Remove from heat; stir in Worcestershire sauce, broth, and tomato paste.
  4. Crumble the ground beef into a mixing bowl; add the onion mixture, breadcrumbs, and the lightly beaten egg. Using a fork, lightly combine, careful to not mash the mixture. A light touch prevents the meatloaves from cooking up dense and tough.
  5. Divide the mixture into six equal portions; shape each into a loaf. Line them on the prepared baking sheet. (At this point, the meatloaves can be wrapped and refrigerated for several hours or even frozen.)
  6. Bake at 350 degrees F for 25-30 minutes or until they reach 140 degrees F on an instant-read thermometer.
  7. While the meatloaves are baking, prepare the glaze by combining the ketchup, hot sauce, vinegar, brown sugar, and coriander in a small saucepan. Bring to a boil; cook until the glaze is thick and syrupy, about 5 minutes.
  8. Using half the glaze, brush the tops and sides of each meatloaf after the 25-30 minute cooking period. Allow to cook an additional 5-10 minutes or until they reach 150-155 degrees F internally. Brush with the remaining glaze and place under the broiler. Broil 5-10 minutes more; remove from oven. Allow to rest 10 minutes before serving.

Yield: Six individual meatloaves

SOURCE: Pink Parsley via Ina Garten from foodnetwork.com with glaze from Cook’s Illustrated